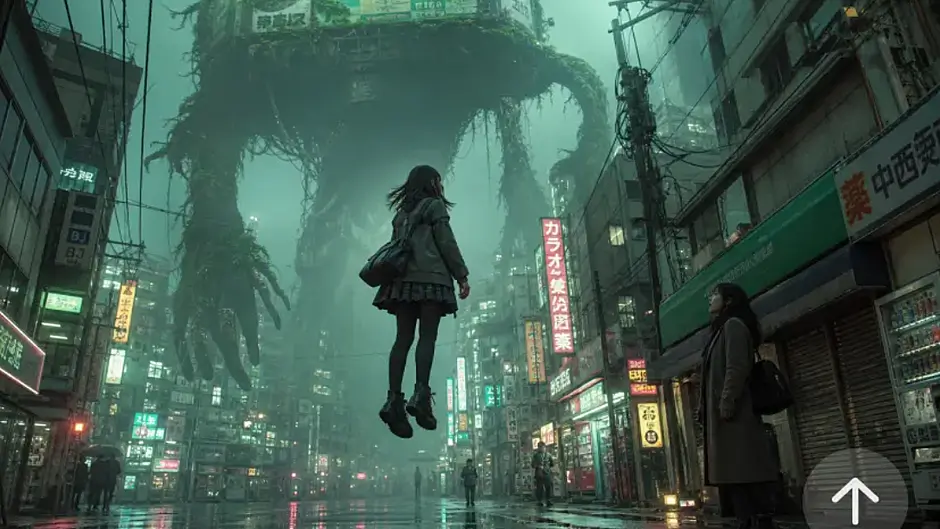
Cyberpunk cities are characterized by their futuristic technology, dense architecture, neon illumination, and stark contrasts between wealth and decay. Dreamina AI helps transform creative descriptions and reference images into imaginative digital cityscapes. It takes more than just glowing signs, though, to create a convincing artwork: perspective, atmosphere, materials, and composition create believable environments. Carefully guided editing allows for the creation of unique futuristic environments for posters, concept art, and creative projects.
Define the Visual Language of a Cyberpunk City
Mix large mega-structures, walkways, small storefronts, and layering. The lighting signature of the city is created by neon signage, holographic displays, illuminated windows, and deep shadows. The inclusion of autonomous vehicles, robotic infrastructure, and digital advertisements brings technology without overpowering the architecture. The rain, mist, atmospheric haze, and reflective pavement create depth and enhance the mood of the environment. Street markets, public spaces, and contrasting storefronts hint at the presence of different communities in the futuristic landscape. Opt for a neutral color scheme, complementing dark foundation colors with subtle accents of cyan, magenta, or amber. With a coherent AI Image Generator workflow, these visual choices can be translated into a cohesive composition. Organize each element around a single idea and don't throw in futuristic details willy-nilly.
ADVERTISEMENT
Build a Cyberpunk Scene From the Ground Up
Start with a defined space, like a rainy alley, a rooftop market, a transit hub, or a commercial area. Choose a street-level frame, a rooftop shot, an aerial panorama, or a tight frame of an architectural corridor from which viewers will view the environment. Have a single focal point, like a huge holographic billboard, a lit-up bridge, or a monumental tower. Then add foreground, middle ground, and background to give believable depth. Select a main light source that will naturally lead the viewer's eye to the focus of the composition. Last but not least, decide if you would prefer to shoot in film, illustrate your concept, render it as a graphic, or render it in anime style.
Steps to Build Cyberpunk City Art with Dreamina
Step 1: Sign in and prompt your neon skyline
- First, sign up or log in to Dreamina to start building your own cyberpunk city.
- Next, select the "Create" tab from the left menu and pick the "AI Image" option.
- Then, enter a detailed prompt describing neon streets, with elements, theme, and concept clearly stated.
Step 2: Pick a style model and set up your scene
- Find the image model options at the bottom of the dialogue box and choose one.
- Seedream, GPT Image, and Nano Banana suit different looks, so select your favorite model here.
- Provide a reference image to make your futuristic cityscape look more precise and truly natural.
- Then, select a custom aspect ratio and resolution from the "Aspect ratio" and "Resolution" tabs.
- Choose the skyline count in "Images to generate" and set your custom size in "Dimensions".
- For glowing signs or slogans, use the "Draw text on image" tab on the artwork.
- Finally, click the "Generate" tab to begin the creation process of your neon-soaked cyberpunk city.
Step 3: Polish your cyberpunk scene and download it
- You will receive the required number of cyberpunk city drafts to review closely and compare. If the mood feels off, click "Edit prompt" or "Regenerate" to refine the generated results.
- You can also upscale the generated artwork with "Creative upscale" to sharpen every neon detail.
- Moreover, use "Retouch" to correct, clean up, or enhance details of the selected artwork image.
- Use "Remove" to erase anything from your image that still breaks the overall futuristic atmosphere. You can also extend your skyline by clicking the "Expand" tab for much wider views.
- Once your image is ready, use the "Generate video" tab to convert it into a video.
- Dreamina gives you complete freedom to edit your cyberpunk artwork exactly the way you like.
- Finally, click the "Download" tab at the top right to save the image file locally.
Six Prompting Techniques for More Convincing Cyberpunk Environments
Effective prompts talk about how things are related to each other, not just random future elements. Use these strategies to provide Dreamina AI with more artistic guidance.
- Architectural layering: Explain spatial relationships between towers, elevated walkways, street-level shops, and transit structures.
- Neon lighting: Identify the location of signs, colors, intensity, reflections, and light spilling on nearby surfaces.
- Atmospheric depth: Establish foreground clarity, distant haze, visibility of background, separation of architectural layers.
- Material definition: Recognise glass facades, wet pavement, brushed metal, concrete, and weathered structural surfaces.
- Human scale detail: Add details like street furniture, storefronts, transit entryways, or even people in the distance, but don't overcrowd the scene.
- Cinematic framing: Set the point of view, focus zone, and direction of sight; provide dark areas for overlay graphics.
Explore Distinct Cyberpunk Art Directions Without Losing the Theme
Amongst the conventions of the future city, cyberpunk can accommodate multiple visual directions. Neon noir is characterized by a strong focus on dramatic shadows, reflective streets, and minimal bright accents. The corporate megacities are characterized by monumental towers, clean surfaces, surveillance systems, and monumental scale. Underground street markets are a mixture of cramped storefronts, cramped signage, exposed cables, and localized illumination. Biopunk settings combine unexpected greenery and natural forms with speculative urban design. Retro-futurist cities add nostalgic tones and geometry in signs as well as older technology aesthetics. Cyberpunk anime style is characterized by stylized silhouettes, expressive buildings, and clearly defined colors. With Dreamina AI, creators can experiment with these directions by tweaking prompts and visual cues.
Refine Architectural Details and Correct Visual Inconsistencies
Overlapping buildings, windows, distorted vehicles, and confusing building geometry can be caused by dense futuristic environments. Check architectural edges, signs, reflections, and perspective before deciding the artwork is complete. When the editing interface allows for it, use Retouch to make adjustments to selected areas. Select Remove to eliminate distracting objects that detract from the composition or that hide important structures. Reference guided generation can be used to promote a desired architectural style, lighting treatment, or color palette. If the overall view is not clear, recreate the image with a more specific composition and instructions.
Extend Cyberpunk Artwork Into a Larger Creative Project
Posters, book covers, game-world mood boards, and concept-art collections can be anchored by a coherent cyberpunk city. Create complementary views utilizing common architectural vocabulary, color, and environmental elements. Reframe wide cityscapes for other aspect ratios when they can be successfully reframed. Illustrations can also be used as visual references for future creative processes. Dreamina AI provides image-to-video experimentation, letting a static city illustration serve as a springboard for animated exploration. But images do not necessarily provide complete architectural continuity from one scene to the next if they are made separately.
Conclusion
When it comes to convincing cyberpunk artwork, it's all about intentional architecture, lighting, material variation, perspective, and depth of atmosphere. Dreamina AI combines image generation with targeted editing, enabling creators to delve into and perfect imaginative city settings. Don't overpower scenes with futuristic objects; focus on relationships between structures, light sources, and surrounding spaces. Consider each prompt a worldbuilding decision; create a recognizable visual identity by purposefully experimenting.